Mass Changing In Myriad 5 Playout
One of the big advantages of Myriad 5 Playout over previous versions is that all content on the Media Wall is stored within the Station Database rather than the folder structure found in Myriad 4. This is advantage for several reasons including:
- All content is displayed on the Media Wall, Library & Replace windows.
- Searching and filtering search results is virtually instantaneous.
- Songs and Links are immediately available for scheduling by Myriad Schedule.
- Changes can be quickly and simply applied.
What can you do?
The simple answer is that using the tools outlined below, you can change just about any element of a selected range of Media Items. You can also perform a number of additional tasks to help you maintain your Media Wall or export content for archiving. Options include:
- Export Content (as standard audio files or transport files)
- Copy Media Items - Duplicate the selected Media Items to another location on the Media Wall.
- Move Media Items - Move Media Items to another location on the Media Wall (remember you would need to update AutoTrack or 3rd party schedule - but not Myriad Schedule)
- Export CSV List - Export a handy list that can be accessed by Excel or other spreadsheet software.
- Mass Change - Apply one or more changes to multiple Media Items at the same time.
- Mass Delete - You can also delete multiple Media Items if you have appropriate permissions.
So let's get started with with applying some changes to a selection of Media Items.
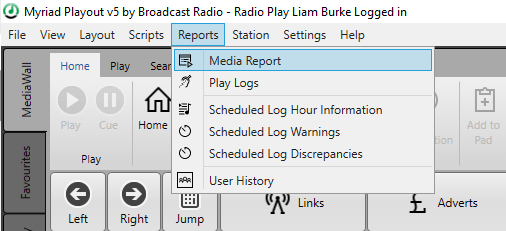
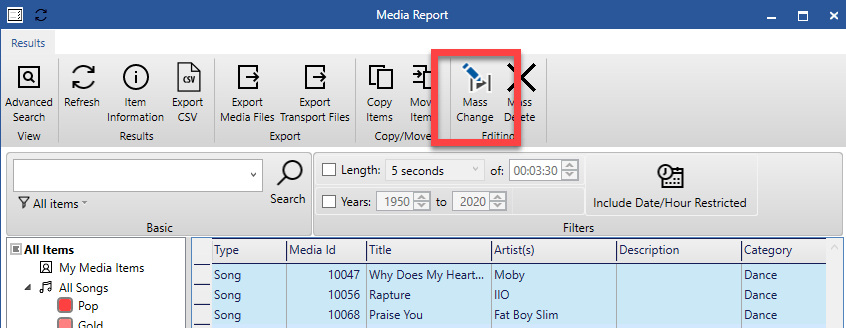
All the tools we need are located in the Media Reports window which is used to both report details about the Media Items on your Media Wall and also to make changes to those Media Items. Click on the Reports Menu and the Media Reports.
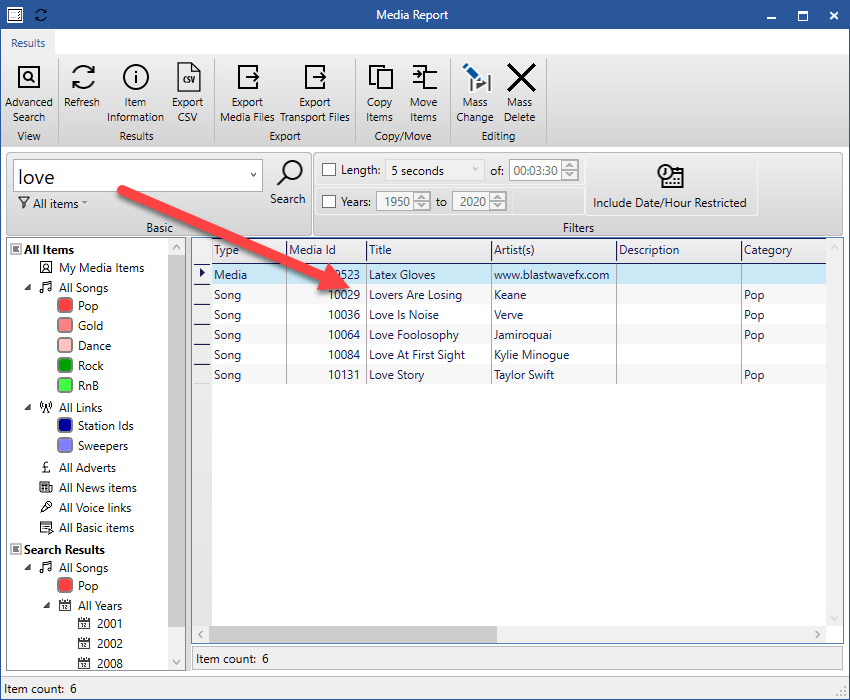
You can use this window to search for the Media Items you want to work with. In the example above we have typed the word 'Love' into the Basic Search
window which has resulted in six Media Items.
If you want a more detailed way of searching for the content you want to work with, click on the Advanced Search
button to to access more search criteria.
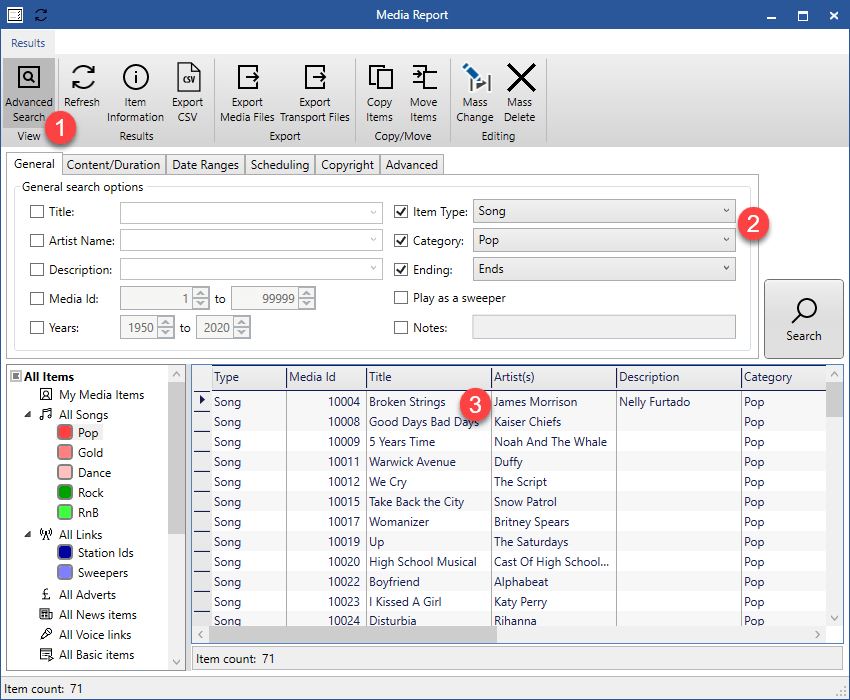
In the screen shot above, we have selected the Advanced Search(1)
options then set the criteria to show Songs(2)
from the Pop Category
that have the Ending:Ends
. The results are displayed in the Search Results(3)
area.
You can also use the 'tree view' on the left hand side to quickly select Medie Item Types and Categories.
Let's change some stuff!
From here we can select multiple Media Items and do a number of things to those items. First you need to select the items you want to affect by either clicking on them (holding down Shift or Ctrl) or selecting them using the mouse.
Once you have selected the Media Items you want to work with, you can use the buttons on the ribbon to select the action you want to perform.
In this example, we will select a few Media Items and then change their background colour, but you can actually choose any Media Item attribute or combine multiple attribute changes in a single operation.
To mass change the background colours of selected Media Items follow these steps.
- Select the Media Items you want to change.
- Click on the Mass Change button.
- On the Mass Change window, click on the Other Tab .
- Click on the Colours option then select Use Custom Colours and select the desired colours.
- Click on the Start Mass Changing Media Items button.

Even when you are applying changes to a lot of Media Items, it should only take a few seconds. Once the changes are made, you will see a confirmation window and your changes will have taken effect.

Other things to try!
You can apply the same process to mass change any Media Item attributes. This opens up a whole host of possibilities such as:
- Mass change Song Categories.
- Apply Hour Restrictions to multiple Media Items.
- Reorganise your Media Wall (use Move or Copy instead of Mass Change).
- Colour code your content.
- Mass export content for long term archive.